Download Digital Certificate
Installing the Digital Certificate
Before Installing the Digital Certificate
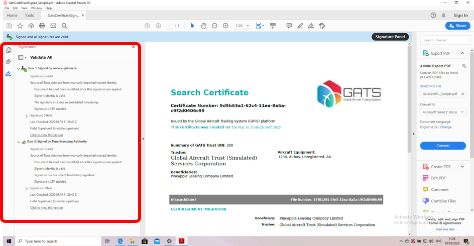
You must install the GATS digital certificate on your machine to see the digital signatures as signed properly. If you do not install the certificate on your machine, you will see a signature error when you try to review the digital signatures on the GATS signed documents.
The image to the right shows the error you will see when looking at a GATS digital signature without the Digital Certificate installed on your computer.
Please note that the installation of the certificate must be done for each device you will use to view signed GATS documents.
The screen shots attached were taken using Windows 10 and the dialog boxes might vary slightly if you use a different operating system.
Step 1 - Download the Certificate
Download the GATS certificate by clicking the “Download Certificate” button on the Digital Certificate Installation panel at the top of the user Dashboard.
Once the file has been downloaded, locate the file on your machine and open the downloaded file in Adobe Acrobat Reader.

If the message does not display on your machine,
download the installation file here
Step 2 - Add to list of Trusted identities
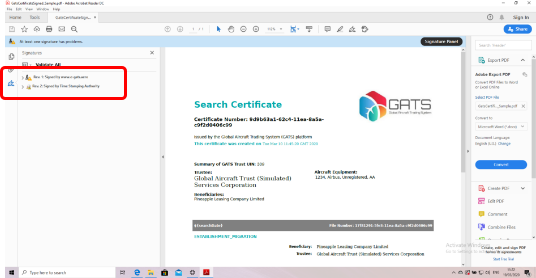
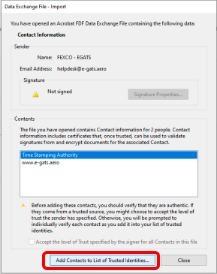
After opening the file a dialog box similar to this one will open. The file allows you to add the FEXCO-EGATS certificate to the list of trusted identities. You will see 2 sections in the Contents part, Time Stamping Authority and www.e-gats.aero. You will need to accept both of these certificates as trusted.
Click the “Add Contacts to the list of Trusted Identities“ button to add the certificate to your list of trusted entities.
Step 3 - Import e-gats Certificate
The Choose Contacts to Import dialog box will appear. Select “www.e-gats.aero” in the list of contacts.
You can see in the Certificates section that the certificate is Issued by DigiCert.
Click the “Import”

Step 4 - Choose the options
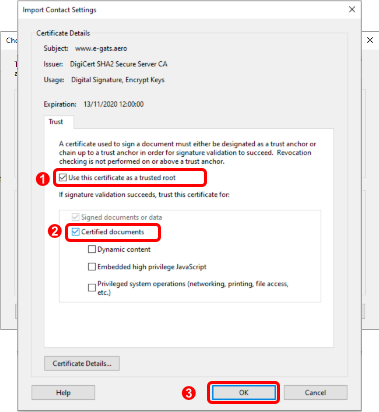
In the import Contact Settings dialog box:
1 - check the box for “Use this certificate as a trusted root”.
2 - Check the “Certified documents” check box
3 - Click “OK”
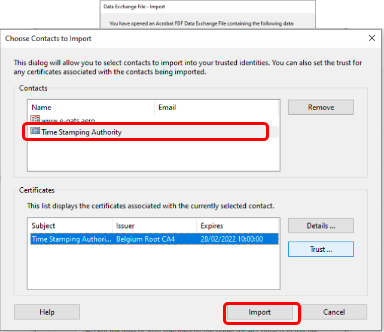
Step 5 - Import Time Stamping Certificate
The Choose Contacts to Import dialog box will appear. Select “Time Stamping Authority” in the list of contacts.
Click the “Import”
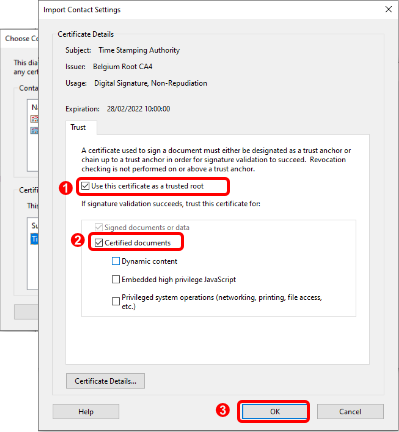
Step 6 - Choose the options
In the import Contact Settings dialog box:
1 - check the box for “Use this certificate as a trusted root”.
2 - Check the “Certified documents” check box
3 - Click “OK”
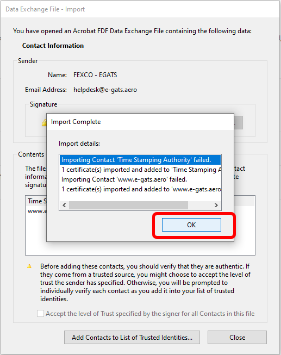
Step 7 - Confirm Import
Complete the import by clicking the “OK” button
Step 8 - View Certificate
After installing the certificate, Signed GATS documents should no longer show the error when they are opened in Adobe Acrobat and you can confirm that you have added the certificate.
Please remember that you will need to install the certificate if you use the GATS platform on another computer.